
On this page
To learn how to split screen on mac, use Split View for two apps in a dedicated full-screen workspace, or tile windows side by side on the desktop.
The distinction matters: one method gives you a focused pair of apps, while the other keeps the desktop available around your work. Start with two open windows, then choose the layout that suits your task. You can change the arrangement later without closing either document.
Choose Split View or desktop tiling
Apple’s Split View places two supported app windows together in a separate desktop space.
Think of a dedicated workspace as the main reason to choose it. The paired windows occupy the screen together, which works well for comparing documents or writing notes beside reference material.
Desktop tiling instead resizes and positions ordinary windows. You can retain access to other windows and the desktop rather than entering a separate full-screen arrangement.
Both approaches are available on current Mac software. The newer desktop tiling controls arrived with macOS Sequoia and continue in Tahoe 26. Earlier releases can use Split View, but their green-button menu wording may differ.
Before arranging anything, open the documents you actually need. Two empty app windows technically split the screen, but preparing the content first makes it easier to judge whether each side has enough room.
Put two apps into Split View
Use the green window button to begin. Hover over it rather than immediately clicking it, because a click can trigger a different window action.
- Open the first app window.
- Hold the pointer over the green button in its upper-left corner.
- In the current menu, choose Full Screen, then Left of Screen or Right of Screen.
- On the other side, click the second app window you want to use.
- Click inside either side to start working there.
On older releases, the menu may describe tiling a window to the left or right of the screen directly. Follow the wording that explicitly places the window into the full-screen pair, rather than assuming every menu item containing “left” behaves identically.
Not every app supports Split View. If an app does not offer the expected option, try another ordinary document window to establish whether the issue is specific to that app.
Start with two different apps if you are troubleshooting. Once the basic process works, try the particular pair of windows needed for your task.
Adjust or leave the paired workspace
The center divider controls how much space each app receives. You do not have to keep an equal split if one document needs more room.
- Move the pointer over the divider between the windows.
- Drag it left or right to resize the two sides.
- Double-click the divider to return to the original sizes.
- To swap sides, drag a window using its title and toolbar area.
Move the pointer toward the top of the display when you need window controls or the menu bar. Some controls are hidden while you are concentrating on the documents.
To replace one side, hover over that window’s green button and choose Replace Tiled Window, then select the replacement.
To take one window back to the desktop, use its green-button menu and choose Move Window to Desktop. The other app remains full screen in its own space. This does not close either app or discard its document.
That last detail prevents a common surprise: leaving the pair does not necessarily bring both windows back to the same desktop automatically.
Tile windows on the desktop instead
Apple’s window tiling controls let you position windows without creating the same dedicated full-screen pair.
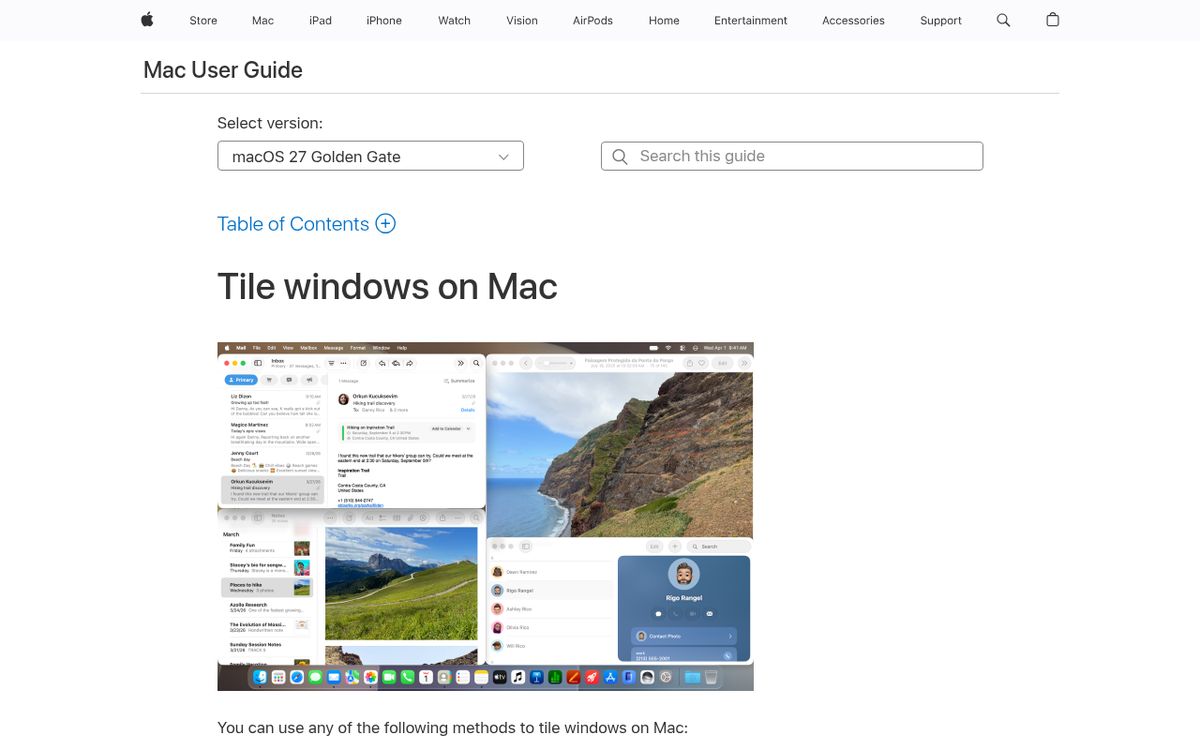
Use edge dragging when you want a quick left-and-right desktop arrangement.
- Drag the first window by its title bar toward the left edge.
- Wait for the highlighted placement area.
- Release the window when the preview shows the intended position.
- Drag the second window toward the right edge.
- Release it when the matching preview appears.
You can also hover over the green button to inspect available layout choices. This is useful when dragging feels imprecise or you want to see the available arrangements before committing.
Holding Option while dragging offers another documented tiling method. Watch the highlighted area rather than releasing the window based only on where its outline appears.
Avoid dragging all the way through the top edge when your goal is a simple side-by-side layout; that gesture can trigger another workspace view instead.
Use shortcuts and adjust tiling settings
Apple documents window tiling keyboard shortcuts for faster placement once you understand the layouts.
The active window is the one these individual placement shortcuts affect.
- Click the window you want to move.
- Press Fn-Control-Left Arrow to place it on the left half.
- Activate the second window.
- Press Fn-Control-Right Arrow to place it on the right half.
- Use Fn-Control-R when you want to restore a tiled window’s previous size.
If dragging does not produce a preview, review Apple’s window tiling settings.
Open System Settings, choose Desktop & Dock, and find the Windows section. Check the options for dragging windows to the screen edges and holding Option while dragging. The same area includes the setting for margins around tiled windows.
Keyboard labels vary, so your Fn key may also display a globe symbol. If a shortcut does not work, use the visible menu command rather than repeatedly pressing different combinations.
Keep the layout comfortable
A readable workspace is more valuable than fitting the maximum number of windows on the display. If each app becomes too narrow, give the primary task more room or switch between windows instead.
For writing, place reference material on one side and your draft on the other. For comparison work, use similar document zoom levels so differences in layout do not distract from differences in content.
Before recording a tutorial, arrange the windows and hide unrelated material. Our guide to recording your screen on a Mac explains the next part of that workflow.
When the task is finished, return windows to comfortable sizes. Split-screen layouts are a convenience, not a requirement to keep every app squeezed into half the display.
Reach designers & developers at work
Sponsored posts, links and listings, each clearly labelled as sponsored. One sponsor per placement.
Become a sponsor